How to Calculate Concrete for Your Project: A Pro's Guide

Grant Cool • November 21, 2025

Starting a concrete project is exciting. Whether you are planning a new driveway, a backyard patio, or a foundation for an addition, the vision of the finished product is always inspiring. But before the mixer truck arrives, there is a critical step that often trips up even experienced DIYers: figuring out exactly how much concrete you need.


Get the math wrong, and you face two equally frustrating scenarios. Order too little, and you’re left with a half-finished slab that will have a visible "cold joint" when you pour the rest later. Order too much, and you’re paying for wasted material and scrambling to find a place to dump the excess.


At Liberty Concrete, we believe that a successful project starts with precise planning. We help homeowners and contractors navigate the estimation process every day, ensuring they get the perfect amount of material for the job. This guide will walk you through why accuracy matters, how the math works, and how our team supports you from calculation to the final pour.


The High Cost of Guesswork

It might be tempting to "eyeball" a project or make a rough guess based on square footage alone. However, concrete is sold by volume—specifically, by the cubic yard—not just by area. This adds a third dimension (depth) that drastically changes the equation.

Why is precision so important?


Avoiding the "Cold Joint" Nightmare

If you run short during a pour, the concrete you've already placed will start to set before the new truck arrives. When you pour wet concrete against partially cured concrete, they don't bond perfectly. This creates a "cold joint"—a visible seam that is structurally weaker and prone to cracking and leaking. It’s the last thing you want in a new driveway or foundation.


Controlling Your Budget

Concrete is an investment. Over-ordering by just one or two cubic yards can add hundreds of dollars to your bill—money that literally ends up as waste. On the flip side, under-ordering leads to "short load" fees for the second truck, which are often much higher per yard than a full load.


Environmental Responsibility

Excess concrete has to go somewhere. Disposing of hardened concrete is difficult and labor-intensive. By ordering correctly, you reduce waste and minimize the environmental footprint of your construction project.


The Basic Formula: Calculating Cubic Yards

To determine how much concrete you need, you must calculate the volume of the space you are filling. The standard unit of measurement for concrete in the United States is the cubic yard.


The basic formula is simple:
Length (feet) x Width (feet) x Depth (feet) = Volume in Cubic Feet

Since there are 27 cubic feet in one cubic yard, you then divide that total by 27.

Volume in Cubic Feet / 27 = Volume in Cubic Yards


A Practical Example

Let's say you are pouring a simple patio that is 10 feet long and 10 feet wide. You want the slab to be 4 inches thick.

  1. Convert inches to feet: First, you must convert the depth from inches to feet.
  • 4 inches ÷ 12 inches/foot = 0.33 feet.
  1. Calculate volume:
  • 10 feet (Length) x 10 feet (Width) x 0.33 feet (Depth) = 33 cubic feet.
  1. Convert to cubic yards:
  • 33 cubic feet ÷ 27 = 1.22 cubic yards.


In this scenario, you need 1.22 cubic yards of concrete. However, real-world projects are rarely this perfect.


Why the "Perfect" Math Isn't Enough

The formula above gives you the theoretical volume. But out in the field, conditions are never perfect. Several factors can affect how much concrete you actually need versus what the calculator says.


The Subgrade Factor

Is your ground perfectly level? Probably not. Even after grading, the dirt or gravel base (subgrade) will have high and low spots. A variation of just half an inch across a large driveway can significantly change the volume required. If your subgrade is uneven, you will almost certainly need more concrete than the strict math suggests.


Spillage and Waste

Some concrete always gets left behind. A small amount stays in the pump hose, some might spill during wheelbarrow transport, and some gets scraped off during the screeding process.


Form Bending

When wet concrete is poured into wooden forms, the weight of the material pushes outward. Even well-braced forms can bow slightly under the pressure. This slight expansion increases the volume needed to fill the space.


The Safety Margin

Because of these variables, Liberty Concrete always recommends adding a safety margin—typically 5% to 10%—to your total. For the patio example above (1.22 cubic yards), adding a 10% buffer brings the total to roughly 1.35 cubic yards. It is always cheaper and easier to discard a small amount of extra concrete than to order a second truck for a tiny shortfall.


How Liberty Concrete Helps You Get It Right

While the math is helpful, you don't have to do it alone. At Liberty Concrete, we act as your partner in project planning. We don't just take orders; we help you verify your needs to ensure your project runs smoothly.


Expert Consultation

When you call us, you aren't just talking to a dispatcher; you're speaking with concrete experts. We can walk you through your measurements. If you have a complex shape—like a curved walkway or a patio with irregular angles—we can help you break it down into simpler shapes (rectangles and triangles) to calculate the volume accurately.


Steps and Footings

Many projects involve more than just a flat slab. Are you pouring stairs? Does your slab have thickened edges (footings) for extra support? These features add volume quickly. We help you account for these "hidden" additives so they don't catch you by surprise on pour day.


Choosing the Right Mix

Calculating the amount is only half the battle; you also need the right kind of concrete. A driveway holding heavy vehicles needs a stronger mix (higher PSI) than a walkway. We guide you toward the specific mix design that fits your project’s structural requirements, ensuring you aren't paying for high-strength industrial concrete when a standard residential mix will do perfectly.


Tips for Measuring Your Project Like a Pro

To help us give you the most accurate quote and supply, follow these measurement tips before you call:

  1. Measure Twice: It sounds cliché, but double-checking your length and width measurements can save you from a costly mistake.
  2. Check Your Depth: Don't just assume your depth is uniform. Use a string line and a tape measure to check the depth at multiple points across the project area. Average these depths to get a more accurate number for your calculation.
  3. Account for Spillage: Be realistic about how you are moving the concrete. If you are wheelbarrowing it a long distance, you will likely spill more than if you are pouring directly from the truck chute.
  4. Draw a Diagram: For odd-shaped projects, sketch a simple diagram with measurements. This visual aid is incredibly helpful when you are discussing the project with our team.


Your Project, Our Priority

At Liberty Concrete, we know that concrete is permanent. You only get one shot to pour it right. That’s why we are committed to helping you plan effectively before the truck ever leaves our yard. We take the stress out of the ordering process so you can focus on the work itself—grading, forming, and finishing.


Whether you are a seasoned contractor pouring a commercial foundation or a homeowner attempting your first sidewalk, we treat your project with the same level of care and precision. We want your pour to be seamless, efficient, and cost-effective.

Don't let estimation anxiety stall your project. Let the experts help you plan for success.


Ready to start your project? Contact Liberty Concrete today for expert estimation advice and reliable concrete delivery!


Meta Information

Meta Title: How to Calculate Concrete Needs | Liberty Concrete Guide
Meta Description:
Don't guess on your concrete order. Liberty Concrete helps you calculate the exact amount needed for your project to avoid waste and extra costs.


You might also like

Liberty Concrete | Blog
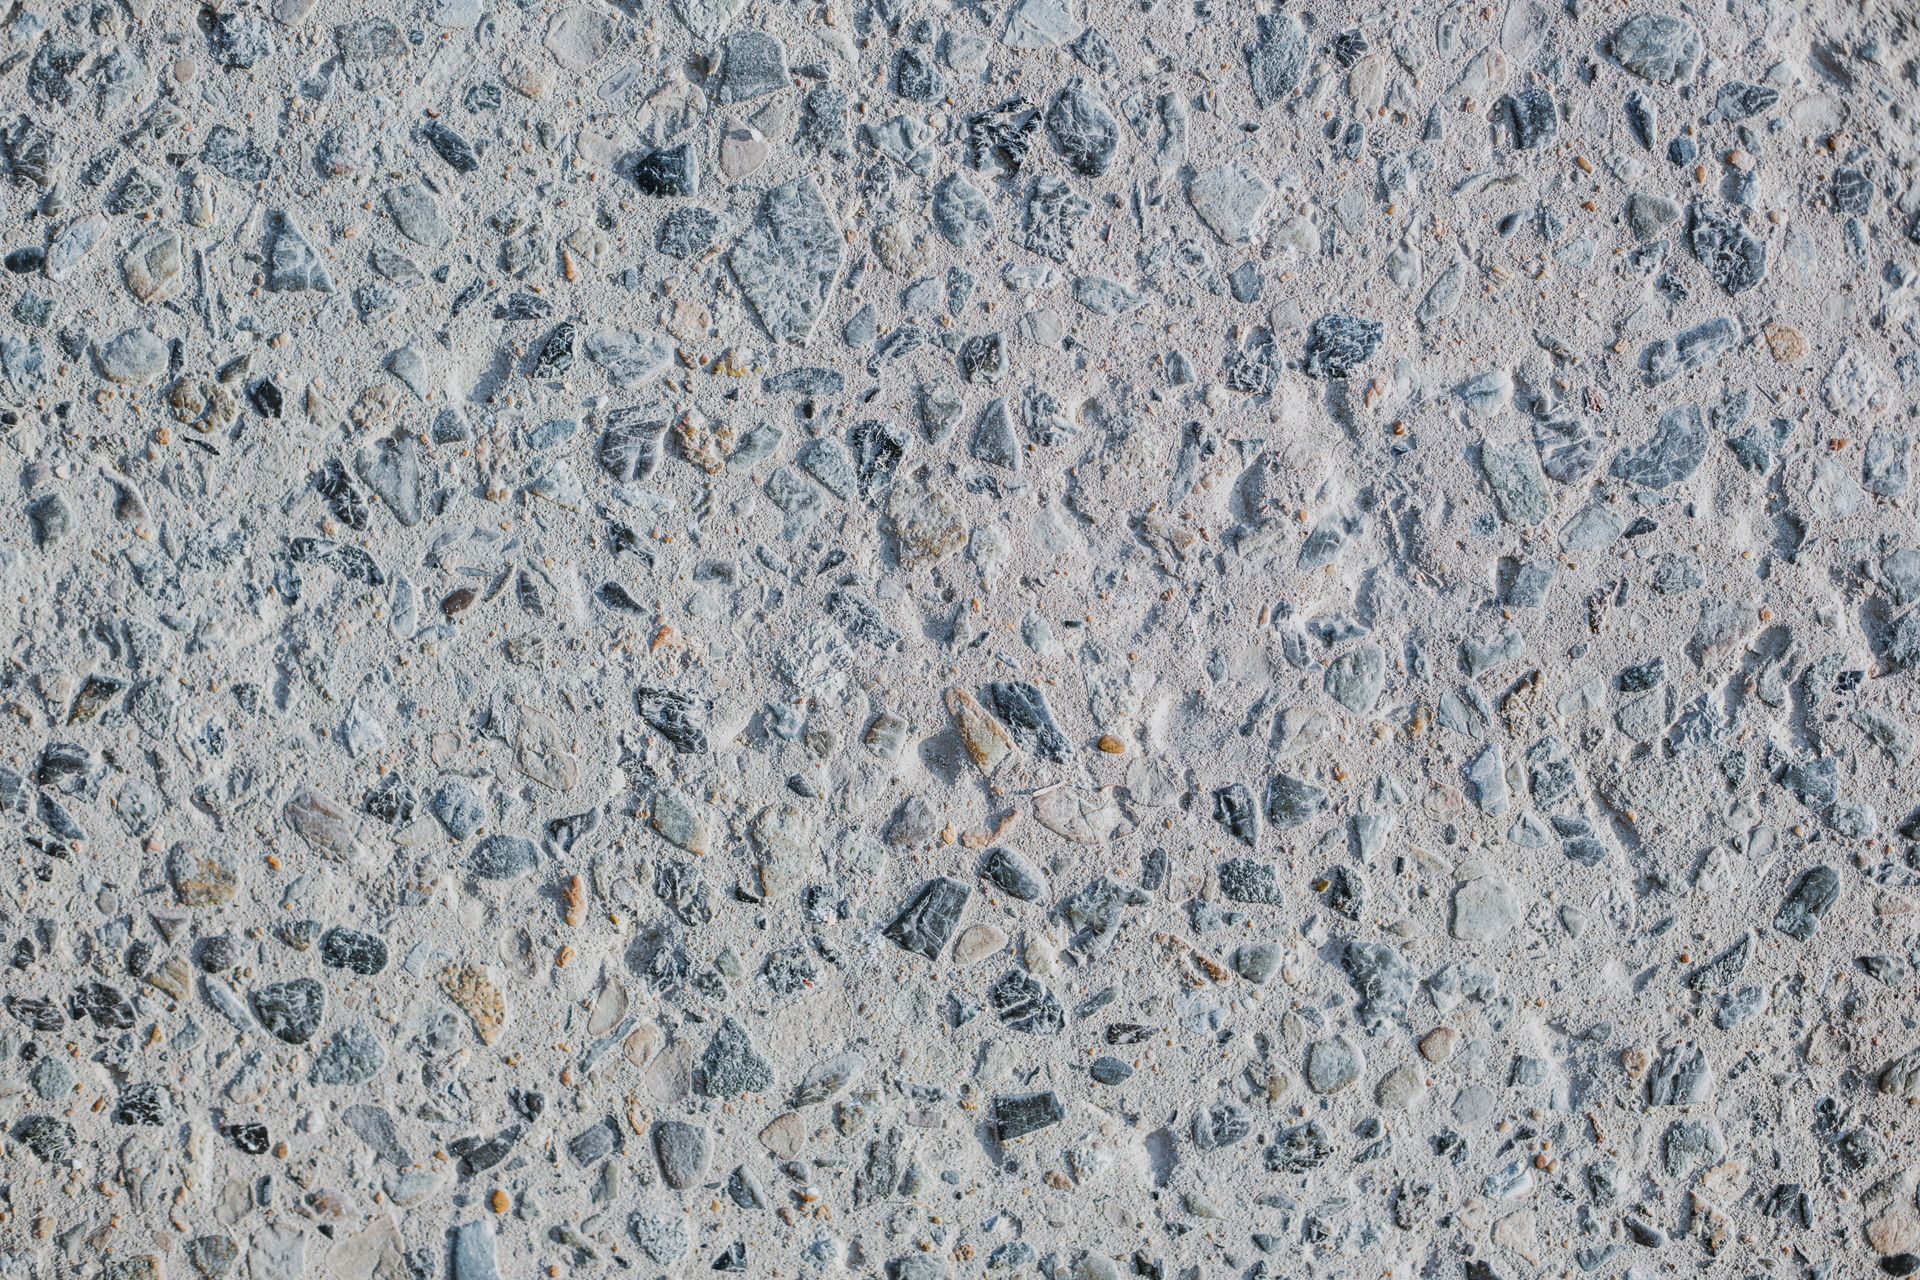
Close-up of speckled gray and blue textured stone surface
By Grant Cool August 4, 2026
Plain gray concrete does its job, but it rarely turns heads. Exposed aggregate changes that. By revealing the natural stones, pebbles, and sand hidden inside the mix, this finish gives you a surface that's tough, textured, and genuinely beautiful—the kind of driveway or patio neighbors ask about. At Liberty Concrete, we help homeowners and property owners understand their options before they pour a single yard. In this guide, you'll learn what exposed aggregate concrete is, how it's made, the benefits that set it apart, where it works best, and the mistakes worth avoiding. By the end, you'll know whether it's the right choice for your project—and how to get it done right. Here's what we'll cover: What exposed aggregate concrete is and how it's made The key benefits, from slip resistance to lasting durability Popular applications, design options, and maintenance tips What Is Exposed Aggregate Concrete? Exposed aggregate concrete is a decorative finish that shows off the stones and pebbles within the concrete mix rather than hiding them under a smooth top layer. Standard concrete is troweled flat, burying its aggregate beneath a coating of cement paste. With exposed aggregate, that top layer is removed while the concrete is still curing. The result reveals the natural texture and color of the stones packed inside—everything from river rock and crushed granite to colored glass and seashells. Think of it as pulling back the curtain on materials that were always there. The strength of the concrete stays intact, but the surface gains a rich, three-dimensional look no plain slab can match. Practical tip: The aggregate you choose defines the entire appearance. Ask to see samples in person, since photos rarely capture the true color and depth of the stones. How Exposed Aggregate Concrete Is Made Getting a clean, even finish takes skill and timing. The process follows a clear sequence, and each step matters. Mixing and Pouring First, we prepare a concrete mix with the decorative aggregate blended in or ready to seed onto the surface. The site is formed and prepped just like any concrete project, then the concrete is poured and leveled. Placing the Aggregate There are two main approaches. In the seeding method , decorative stones are scattered across the fresh surface and pressed in by hand or float. In the integral method , the aggregate is mixed throughout the batch before pouring. Each method suits different looks and budgets. Exposing the Surface Here's where the magic happens. Before the concrete fully hardens, the thin top layer of cement paste is washed and brushed away, uncovering the stones beneath. Timing is everything—too early and the stones dislodge, too late and the paste won't budge. Sealing and Finishing Once the surface is clean and cured, we apply a sealer. This locks in the color, protects against stains, and gives the finish a subtle sheen that makes the aggregate pop. Practical tip: This is not a project for guesswork. The window for exposing the surface is short, and rushing it ruins the finish. Experienced installation is what separates a stunning result from a patchy one. Key Benefits of Exposed Aggregate Concrete Exposed aggregate isn't just about looks—though it delivers there too. It solves real problems that homeowners care about. Slip Resistance The textured surface provides natural grip underfoot. Unlike smooth, polished concrete that turns slick when wet, exposed aggregate gives traction even in rain or around water. That makes it a smart, safety-minded choice for pool decks, walkways, and sloped driveways. Outstanding Durability This surface is built to endure. It stands up to heavy foot traffic, vehicle weight, and years of weather without losing its character. Because the tough aggregate sits right at the surface, it resists wear far better than a plain troweled finish. Low Maintenance Exposed aggregate hides dirt, minor cracks, and imperfections that would stand out on smooth concrete. With periodic sealing and simple cleaning, it keeps its appeal for decades with very little effort on your part. Aesthetic Versatility Few surfaces offer this much design freedom. You can match the aggregate to your home's style, landscaping, or existing hardscape, creating a custom look that plain concrete simply can't replicate. Strong Value You get a decorative, high-end appearance without the price tag of natural stone or pavers. For property owners, that combination of beauty and longevity adds real curb appeal and resale value. Practical tip: If safety is a priority—say, around a pool or on a steep drive—exposed aggregate often outperforms stamped or smooth concrete because of its built-in traction. Common Applications Around Your Property Exposed aggregate works almost anywhere you'd pour concrete, and it shines in a few spots in particular. Driveways. The durability handles vehicle weight and daily use, while the texture adds instant curb appeal. It's one of the most popular choices we install. Patios. A textured, decorative surface turns an outdoor living area into a genuine showpiece that stays comfortable underfoot. Pool surrounds. Slip resistance is the star here. The grippy finish keeps footing secure on wet decks, and it stays cooler than many dark, smooth surfaces. Walkways and paths. Exposed aggregate guides the eye and ties your landscape together, all while offering safe, sure footing. Entryways and courtyards. A distinctive front approach makes a strong first impression and sets the tone for the rest of your property. Practical tip: For a cohesive look, carry the same aggregate finish across connected areas—like a driveway that flows into a matching front walkway. Design and Finish Options The choices don't stop at "exposed or not." This finish is highly customizable. Aggregate type. River rock delivers smooth, rounded stones, while crushed granite or limestone offers sharper edges and a more angular feel. Recycled glass and seashells add unique flair for standout projects. Color. Aggregate ranges from warm tans and reds to cool grays, blacks, and whites. You can also tint the surrounding concrete to complement or contrast the stones. Exposure depth. A light exposure barely reveals the tops of the stones for a subtle texture. A deeper exposure showcases more of each stone for a bolder, chunkier look. Aggregate size. Fine pebbles create a smooth, refined finish, while larger stones make a dramatic statement. The scale of your project often guides this choice. Practical tip: Consider your surroundings before choosing. Lighter aggregates stay cooler in direct sun—worth remembering for a pool deck or a patio that bakes all afternoon. Maintenance Tips to Keep It Looking Great One of the quiet advantages of exposed aggregate is how little it asks of you. A simple routine keeps it looking fresh for years. Rinse regularly. A garden hose clears away loose dirt, leaves, and debris before they settle into the texture. Clean gently. For deeper cleaning, use mild soap and water with a stiff broom. Skip harsh chemicals that can damage the sealer. Reseal on schedule. Plan to reseal every two to three years, depending on wear and exposure. Sealing protects the surface, revives the color, and guards against stains. Address spills quickly. Wipe up oil, grease, and other stains promptly to keep them from soaking in. Watch for weeds. In walkways and joints, pull weeds early so roots don't work into the surface over time. Practical tip: Set a reminder to inspect your sealer each year. If water no longer beads on the surface, it's time to reseal. Common Mistakes to Avoid Even a beautiful material can disappoint if the details are mishandled. Keep these pitfalls in mind. Hiring inexperienced installers. The exposure timing is unforgiving. Poor timing leads to loose stones, uneven texture, or a weak surface. This is a job for professionals. Skipping the sealer. An unsealed surface stains easily and fades faster. Sealing is not optional—it's essential protection. Choosing aggregate by photo alone. Colors and textures look different in person and at scale. Always review physical samples before committing. Ignoring drainage. Like any concrete surface, exposed aggregate needs proper slope and drainage so water never pools and undermines the slab. Neglecting long-term care. Skipping resealing shortens the life and dulls the beauty of your investment. A little upkeep goes a long way. Underestimating the mix design. The right ratio of aggregate to concrete affects both strength and appearance. Getting it wrong compromises the whole surface. Frequently Asked Questions Is exposed aggregate concrete more expensive than regular concrete? It typically costs more than a plain finish because of the decorative aggregate and the added labor to expose and seal it. That said, it usually costs less than natural stone or pavers while offering a comparable high-end look and excellent durability. How long does exposed aggregate concrete last? With proper installation and regular sealing, it can last decades. The tough aggregate at the surface resists wear well, making it one of the more durable decorative options available. Is it slippery when wet? No—that's one of its biggest strengths. The textured surface provides natural traction, which is why it's a favorite for pool decks and walkways where safety matters. Can exposed aggregate be added to my existing concrete? Exposed aggregate is created during the pouring process, so it can't simply be applied over an existing slab. However, decorative overlays may be an option in some cases. An on-site assessment tells us what will work for your space. Does it get hot in direct sunlight? Like most outdoor surfaces, it warms in the sun, but lighter-colored aggregates stay noticeably cooler. Choosing a lighter stone is a smart move for pool areas and sun-drenched patios. How often should I reseal it? Every two to three years is a good rule of thumb, though high-traffic or heavily exposed areas may need it sooner. When water stops beading on the surface, it's time to reseal. Choose Exposed Aggregate With a Local Expert You Can Trust Exposed aggregate concrete brings together the best of both worlds: the strength and value of concrete with the beauty and texture of natural stone. It resists slips, stands up to years of use, hides wear gracefully, and lets you design a surface that fits your property perfectly. The key to getting all of that is precise installation and thoughtful design—which is exactly where experience counts. That's the work we do best. Liberty Concrete helps homeowners and property owners understand their options, choose the right aggregate and finish, and get a result built to last. From driveways and patios to pool surrounds and walkways, our team brings the skill and local know-how you need to move forward with confidence. Contact Liberty Concrete today to talk through your project—and let's create an exposed aggregate surface you'll be proud of for years to come. Meta Title: Understanding Exposed Aggregate Concrete | Liberty Concrete Meta Description: Learn what exposed aggregate concrete is, its benefits, applications, and design options. Liberty Concrete helps you choose the right finish with confidence.
Orange flames rising over glowing embers in a dark fire pit
By Grant Cool July 31, 2026
Few things transform an outdoor space like the warm glow of a fire. A well-placed fire feature turns an ordinary patio into a gathering spot, a quiet retreat, and the heart of your backyard—all at once. And when that fire is built into durable, beautifully finished concrete? You get a centerpiece that looks incredible and lasts for decades. At Liberty Concrete, we help homeowners discover and choose the right fire add-ons for their concrete surfaces. Concrete is uniquely suited to fire features: it's fire-resistant, endlessly customizable, and tough enough to handle the elements year after year. In this guide, you'll explore the most popular fire options, learn how they elevate your outdoor living space, pick up design and safety tips, and see the mistakes worth avoiding. By the end, you'll know exactly which fire feature fits your yard—and how to bring it to life. Here's what we'll cover: Popular fire feature options for concrete surfaces How fire features enhance outdoor living Design, style, and safety considerations Common mistakes and answers to your questions Popular Fire Feature Options for Concrete Surfaces Fire features come in more shapes and styles than most homeowners expect. Each one brings its own personality, and concrete makes every version stronger and more customizable. Here are the options we're asked about most. Concrete Fire Pits A concrete fire pit is the classic choice—an open, contained space for a real wood or gas fire. Built from poured or cast concrete, it delivers rugged durability and a natural, grounded look that fits almost any backyard. It's perfect for roasting marshmallows, telling stories, and gathering friends on a cool evening. Practical tip: Decide between wood-burning and gas early. Wood offers that crackle and campfire aroma, while gas gives you instant, mess-free flames at the flip of a switch. Fire Tables A fire table combines a functional tabletop with a built-in flame running down the center or along one edge. It's the sophisticated option—ideal for entertaining, since guests can set down drinks and plates while enjoying the warmth. Concrete fire tables feel substantial and modern, anchoring a seating area with real presence. Practical tip: Match the table height to your seating. A lower profile suits lounge chairs, while a taller build works better with dining furniture. Fire Bowls Fire bowls are compact, sculptural, and striking. These rounded vessels hold a contained flame and often work in pairs to frame an entryway, pool deck, or staircase. Cast in concrete, they blend artistic form with serious durability, adding drama without dominating the space. Practical tip: Use fire bowls to create symmetry. Placing a matching pair on either side of a focal point delivers a polished, high-end effect. Fire Pit Surrounds A fire pit surround is the finished concrete border and seating structure built around a fire feature. It ties everything together, offering a place to sit, rest a glass, or simply define the area. A well-crafted surround turns a basic fire pit into a designed outdoor room. Practical tip: Build the surround wide enough to double as casual seating. It saves space and creates a natural circle around the flame. In-Ground Fire Pits Set flush with your patio or landscape, an in-ground fire pit offers a sleek, minimalist look that keeps sightlines open. Because it sits low and integrated, it feels like a seamless part of your surface rather than an add-on. Concrete is the ideal material here, forming a clean, permanent edge that stands up to constant heat. Practical tip: Plan for drainage. An in-ground design needs proper runoff so water doesn't collect in the pit after rain. Concrete Hearths A hearth extends fire from the backyard to a more architectural setting—think an outdoor fireplace base or a raised platform that grounds a vertical fire feature. Concrete hearths bring a warm, timeless quality and pair beautifully with stone, tile, or stucco surrounds for a truly custom look. Practical tip: Consider the hearth as a design anchor. A raised concrete hearth can define an entire outdoor living zone and give the space a finished, intentional feel. How Fire Features Enhance Your Outdoor Living Space A fire feature does far more than provide warmth. It changes how you use your yard—and how much you enjoy it. Extended seasons. With a fire feature, chilly spring and fall evenings become inviting instead of off-limits. You'll spend more time outdoors, more months of the year. A natural gathering point. People are drawn to fire. It pulls family and guests together, creating a focal point that sparks conversation and slows everyone down. Added ambiance. The soft, flickering light instantly warms the mood of any patio. It's the difference between a space you walk past and a space you want to linger in. Real value. A permanent, well-built fire feature is an attractive upgrade that boosts your home's appeal. Buyers notice a thoughtfully designed outdoor living area. Because concrete is so versatile, it lets you build these benefits into a form that matches your exact style and space—no compromises. Design and Style Considerations The right fire feature should feel like it belongs in your yard, not bolted on as an afterthought. A few decisions shape the final result. Shape and geometry. Round designs feel casual and communal, while square or linear shapes lean modern and architectural. Choose the geometry that echoes your home and existing hardscape. Finish and texture. Concrete offers remarkable range. A smooth, polished surface reads sleek and contemporary, while textured or board-formed finishes bring warmth and character. Color. Integral pigments and stains let you match the fire feature to your patio, home exterior, or landscape. A cohesive color palette makes the whole space feel designed. Scale. Size the feature to your space and your gatherings. A grand fire table overwhelms a small courtyard, while a modest bowl gets lost on a sprawling deck. Fuel type. Gas and wood each shape the look and function. Gas lines and burners require planning, so factor them in during the design stage—not after the pour. Practical tip: Bring us photos of your patio and home. Seeing the full setting helps us recommend a fire feature that complements everything around it. Safety Tips for Concrete Fire Features Fire and beauty go hand in hand only when safety comes first. Concrete is naturally fire-resistant, which gives you a strong foundation—but smart planning matters just as much. Respect clearances. Keep fire features a safe distance from your home, fences, overhanging branches, and anything flammable. Give the flames plenty of open space. Choose the right materials. Not every concrete mix handles direct, repeated heat the same way. Proper heat-rated materials and liners prevent cracking and premature wear. Ensure good ventilation. Fire needs airflow. Adequate ventilation keeps flames burning cleanly and safely, especially with gas systems. Plan gas installation professionally. Gas lines and connections should always be installed by qualified professionals. This isn't a place to cut corners. Keep safety tools close. A fire extinguisher, water source, or sand nearby gives you quick control if you ever need it. Never leave a fire unattended. Extinguish flames fully before heading inside, and keep an eye on children and pets around any active fire. Common Mistakes to Avoid A little foresight prevents the missteps that undercut even the best fire feature plans. Skipping heat-rated construction. Standard concrete alone may crack under constant high heat. Proper materials and reinforcement are essential for a feature that lasts. Poor placement. Positioning a fire feature too close to structures, in a windy corner, or in an awkward traffic path spoils both safety and enjoyment. Location deserves careful thought. Ignoring fuel logistics. Deciding on gas after installation means expensive retrofitting. Settle your fuel type before the build begins. Overlooking drainage. In-ground and low-profile features need proper runoff so water doesn't pool and cause problems. DIY on complex builds. Custom concrete work, gas connections, and heat management call for real expertise. Rushed amateur jobs tend to show—and can be unsafe. Forgetting the surroundings. A fire feature should coordinate with your patio, seating, and landscape. Treat it as part of the whole design, not an isolated piece. Frequently Asked Questions Is concrete safe for fire features? Yes. Concrete is naturally fire-resistant, which makes it an excellent choice. The key is using properly heat-rated materials and sound construction so it handles repeated high temperatures without cracking. Should I choose wood-burning or gas? It comes down to preference. Wood delivers a traditional crackle and aroma but needs fuel storage and cleanup. Gas offers instant, controllable flames with far less maintenance. We'll help you weigh both for your lifestyle. Can a fire feature be added to my existing patio? Often, yes. Freestanding options like fire bowls and tables can suit existing surfaces, while in-ground pits and integrated hearths are best planned as part of a larger project. An assessment tells us what your space allows. How much maintenance do concrete fire features need? Not much. Concrete is durable and low-maintenance. Occasional cleaning and periodic sealing keep it looking sharp, and gas systems benefit from routine checks to run safely. Will a fire feature crack over time? Properly built, heat-rated concrete resists cracking well. Using the right mix, reinforcement, and professional installation is what protects your feature for the long haul. Which fire feature is best for a small yard? Compact options like fire bowls or a modest in-ground pit work beautifully in tighter spaces. They add warmth and style without overwhelming the area. Bring Warmth and Style to Your Concrete Surfaces A fire feature is one of the most rewarding upgrades you can make to an outdoor space. Whether it's a rugged fire pit, an elegant fire table, a pair of sculptural fire bowls, a seamless in-ground design, or a timeless concrete hearth, the right choice extends your seasons, gathers your people, and gives your yard a genuine focal point. The secret is matching the feature to your space—and building it correctly so it performs safely for years. That's exactly what we do. Liberty Concrete works with you from first idea to final flame, helping you find the fire add-ons that fit your style and bringing them to life with expert local craftsmanship and heat-rated construction you can trust. Contact Liberty Concrete today to talk through the fire feature you have in mind—and let's create an outdoor space you'll gather around for years to come. Meta Title: Fire Features for Concrete Surfaces | Liberty Concrete Meta Description: Discover great fire add-ons for your concrete surfaces—fire pits, fire tables, bowls, in-ground designs, and hearths. Liberty Concrete can help you choose.
Modern kitchen with dark wood cabinets, marble countertops, and a black cooktop
By Grant Cool July 14, 2026
Plain gray concrete is a thing of the past. These days, concrete can shimmer with embedded glass, mimic natural stone, glow with rich color, and even warm your feet on a frosty morning. If your idea of concrete stops at a dull slab, you're in for a pleasant surprise. At Liberty Concrete, we help homeowners turn ordinary concrete into eye-catching features that reflect their style and elevate their space. In this guide, you'll explore the most stunning upgrades available for concrete surfaces—decorative finishes, embedded objects, custom coloring, engraving, epoxy coatings, radiant heating, and custom edges. You'll also pick up practical tips for each, answers to common questions, mistakes to avoid, and a clear next step to make it happen. Here's what we'll cover: Decorative finishes that reinvent the look Embedded objects for a truly custom surface Custom coloring that makes concrete yours Engraving, epoxy, radiant heat, and edge profiles Decorative Finishes That Reinvent the Look The finish sets the mood for your entire surface. These three options are the most popular ways to move beyond plain concrete—and each brings its own character. Stamped Concrete Stamped concrete presses molds into fresh concrete to replicate brick, slate, cobblestone, or wood planks. You get the high-end look of premium materials without the price tag, grout lines, or shifting pavers. It's a standout choice for patios, driveways, and walkways. Exposed Aggregate This finish exposes the natural stones inside the concrete, creating a textured, pebbled surface with real visual depth. It also delivers excellent slip resistance, which makes it a smart pick for pool decks and outdoor steps. Polished Concrete Grinding and polishing the surface produces a sleek, glossy finish that catches the light beautifully. Polished concrete resists stains, needs little upkeep, and brings a clean, modern feel to interior floors. Practical tip: Match the finish to the space. Smooth polish shines indoors, while textured exposed aggregate keeps things safe where water is involved. Embedded Objects for a Truly Custom Surface Want a surface no one else has? Embedding objects into concrete makes it possible. During the pour or finishing stage, we can set materials right into the surface for a one-of-a-kind result. Stones and pebbles for an earthy, organic feel Recycled or colored glass that sparkles in the light Seashells for a coastal, personal touch Tile fragments or metal accents for artistic flair Embedded features work beautifully as focal points—picture a decorative border, a countertop flecked with glimmering glass, or a patio inlay that sparks conversation. Practical tip: Objects near the surface need proper sealing to stay secure and vibrant. This is delicate work best left to a professional to avoid loose or uneven results. Custom Coloring That Makes Concrete Yours Color is where concrete truly becomes personal. There are three main ways to add it, each with a distinct effect. Integral Pigments Pigment is mixed into the concrete before it's poured, running color all the way through the material. The result is a consistent, lasting tone that won't fade or chip away over time. Acid Staining Acid stains react chemically with the concrete to create rich, marbled, variegated tones. No two stained surfaces look exactly alike, giving you depth and character that can't be copied. Dyes Concrete dyes deliver bold, vibrant, and precise color. They're ideal when you want a specific shade or a more uniform, saturated look. Practical tip: Combine methods for striking results—an integral base color layered with acid-stain accents, for example. We'll show you samples so you know exactly what to expect before we commit. Engraving and Custom Patterns Engraving cuts designs, borders, or patterns directly into cured concrete. It's a subtle yet powerful way to make a surface feel intentional and unique. Popular options include geometric patterns, tile-look grids, medallions, and even custom logos or family monograms. Engraving pairs especially well with staining, since the cut lines and color work together to define the design. Practical tip: Engraving works on both new and existing concrete, so you can refresh a plain slab you already have—no full replacement required. Epoxy Coatings for Style and Protection Epoxy coatings pull double duty: they look incredible and shield the surface below. Applied over concrete, epoxy forms a durable, seamless layer that resists stains, chemicals, and abrasion. The design possibilities are impressive: Metallic epoxy with swirling, three-dimensional depth Flake or chip systems for a speckled, textured finish Solid colors for a clean, high-gloss look Epoxy is a favorite for garage floors, basements, and high-traffic areas where durability matters as much as style. Practical tip: Surface prep makes or breaks an epoxy job. Proper cleaning, etching, and curing are essential for a coating that lasts—one more reason to trust professional installation. Radiant Heating Beneath Concrete Here's a feature that turns concrete from cool to cozy. Radiant heating systems install beneath the surface, warming the concrete from below and radiating steady, even heat into the room. It's an efficient way to warm floors evenly, banish cold spots, and enjoy toasty surfaces underfoot on chilly mornings. Because concrete holds heat so well, it's a natural partner for radiant systems. Practical tip: Radiant heating must be planned before the pour, so raise it early in the design conversation. Retrofitting later is far more difficult and expensive. Custom Edge Profiles Edges are easy to overlook, but they shape how polished a surface feels. Custom edge profiles define the border of countertops, patios, and steps with a finished, deliberate touch. Options range from crisp, square modern edges to rounded bullnose profiles and decorative chiseled or beveled looks. The right edge pulls the whole design together and signals quality craftsmanship. Practical tip: Balance style with function. Rounded edges are safer in homes with small children, while sharp square edges lean contemporary. Common Mistakes to Avoid A few missteps can undercut even the best design ideas. Keep these in mind: Skipping the sealer. Decorative finishes, colors, and embedded objects all need proper sealing to stay protected and vivid. DIY on complex features. Stamping, embedding, and epoxy demand skill and precise timing. Rushed or amateur work tends to show. Planning heating too late. Radiant systems must go in before the pour—decide early. Ignoring the setting. Choose finishes and colors that complement your home and hold up to how you actually use the space. Frequently Asked Questions Can these features be added to existing concrete? Some can. Engraving, staining, epoxy coatings, and polishing often work on existing surfaces. Others—like embedded objects, stamping, and radiant heating—need to happen during a new pour. Which decorative finish is most durable? All hold up well when sealed correctly. Epoxy and polished concrete are especially tough for high-traffic areas, while stamped and exposed aggregate excel outdoors. Do colored or decorative surfaces need special maintenance? Not much. Regular cleaning and periodic resealing keep colors bright and finishes protected for years. Is radiant heating worth it under concrete? For many homeowners, yes. Concrete holds and radiates heat efficiently, making it a comfortable, even, and cost-effective way to warm a room. Can I combine multiple features? Absolutely. Some of the best results mix finishes—like a stamped patio with custom color and a decorative edge, or a polished floor with engraved accents. How do I know which features fit my project? That's where a local expert helps. We assess your space, style, and goals, then recommend the options that work best together. Bring Your Concrete Vision to Life Concrete is far more versatile than most people expect. With decorative finishes, embedded objects, custom coloring, engraving, epoxy coatings, radiant heating, and tailored edges, you can transform a plain surface into a genuine showpiece. The secret is choosing the right combination for your space—and installing it correctly so it lasts for years. That's exactly what we do. Liberty Concrete works with you from first idea to final finish, helping you explore stunning options and bring them to life with expert local craftsmanship. Contact Liberty Concrete today to talk through the features you have in mind—and let's create a concrete surface that's truly your own. Meta Title: Stunning Concrete Surface Features | Liberty Concrete Meta Description: Discover stunning features for your concrete surfaces—stamped finishes, embedded glass, custom color, epoxy, radiant heat, and more. Liberty Concrete can help.